On YouTube TV, users can easily delete their scheduled recordings on different devices like desktops, mobile phones, and Smart TVs once they’ve finished watching their desired content.
It’s important to note that when you remove or delete scheduled recordings from your library, it doesn’t affect the shows and movies you’ve already recorded. Those will still be available in your library. Sit back and read on to learn how to delete scheduled recordings on YouTube TV.
What is YouTube TV?
YouTube TV offers an internet-based streaming service for watching television. Additionally, it allows users to enjoy TV channels and on-demand content on devices such as smartphones, tablets, smart TVs, and computers.
This service provides a range of channels covering sports, news, entertainment, and more. Typically offered through a subscription model, it has become popular among those who want an alternative to cable or satellite TV services. Additionally, users can save their shows or events using a cloud-based DVR for future viewing.
Delete Recordings on YouTube TV:
Eliminating Recordings on YouTube TV can be a bit puzzling for some users. It’s important to note that you cannot manually delete saved recordings on the platform.
However, you do have the option to prevent specific shows or series from being recorded on your YouTube TV. Additionally, it’s worth knowing that YouTube TV recordings are set to be automatically removed after a period of 9 months in case you forget to take action.
How to Delete Scheduled Recordings on YouTube TV Website:
Here’s how you can remove recordings on the YouTube TV website:
- Launch a web browser on your desktop or smartphone and go to the official YouTube TV website.
- Log in to your YouTube TV account using your credentials.
- Navigate to the Library Tab.
- Select the specific shows or movies you wish to prevent YouTube TV from recording.
- Click on the Menu, represented by a three-dot icon, next to the selected content.
- From the menu that appears, choose “Add to Library.” This action will ensure that YouTube TV does not continue to record the selected content.
How to Delete Scheduled Recordings on YouTube TV Mobile App:
To delete recordings using the YouTube TV mobile app, follow these steps:
- Open the YouTube TV app on your Android or iOS smartphone.
- Navigate to the Library tab to view the list of available shows and movies.
- Select the specific shows and movies you wish to remove from the list.
- Tap “Add to Library” to delete the recording.
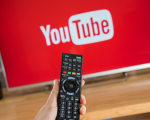
How to Delete Scheduled Recordings on YouTube Smart TV:
Here’s how you can delete recordings on YouTube TV:
- Begin by launching the YouTube TV application and accessing the home screen.
- Navigate to the Library section and pick the content, be it movies or shows, that you wish to remove.
- Using your remote control, select the “Add to Library” option located at the top left of the screen. This action will remove the selected content from your library.
Auto Delete Watched Recordings on YouTube TV:
Automatically Removing Watched Recordings on YouTube TV
Enabling the Auto Delete feature on YouTube TV ensures that your recordings are automatically removed after you’ve finished watching them.
- Open YouTube TV on your mobile device or desktop and access the Settings.
- Within Settings, choose the “Recordings” option.
- Now, click or tap on “Auto Delete.”
- Depending on your preference, select either “Keep only the most recent two weeks of recordings” or “Allow all recordings to expire after four weeks.” This choice determines the automatic deletion timeline for your watched recordings.
Having covered the procedures for deleting scheduled recordings on YouTube TV, we believe you now clearly understand these deletion methods. It’s essential to select the appropriate method that matches your specific device. With these closing words, we conclude this article and look forward to welcoming you to another engaging topic in the near future.