Sometimes, we need to create a digital file of a document or save important documents on the cloud to ensure their accessibility at any time and protect them from loss or destruction. We refer to this digital version of documents as the Scanned form.
You must have used a third-party app to scan documents or dedicated software to convert the pictures or documents into PDFs, Right? But if I told you that your iPhone has a hidden scanner? Sounds exciting?
You don’t need any other third-party apps to scan your documents if you’re an iPhone user. You can easily make a document scan and convert it into a PDF through the Apple Notes App, which is pre-downloaded on the iPhone.
If you are an iPhone user and dont know about that hidden scanner, this informative blog is for you. We will provide a step-by-step guide on how to scan a document with an iPhone. Here is how you can do it.
How to Scan a Document With an iPhone: Step-by-Step Guide
For the best results, place the document you want to scan against a contrasting background. Specifically, if you’re scanning a white paper, position it on a dark surface, such as a wooden table. Consequently, this contrast will enable your iPhone to more easily distinguish the document from its background.
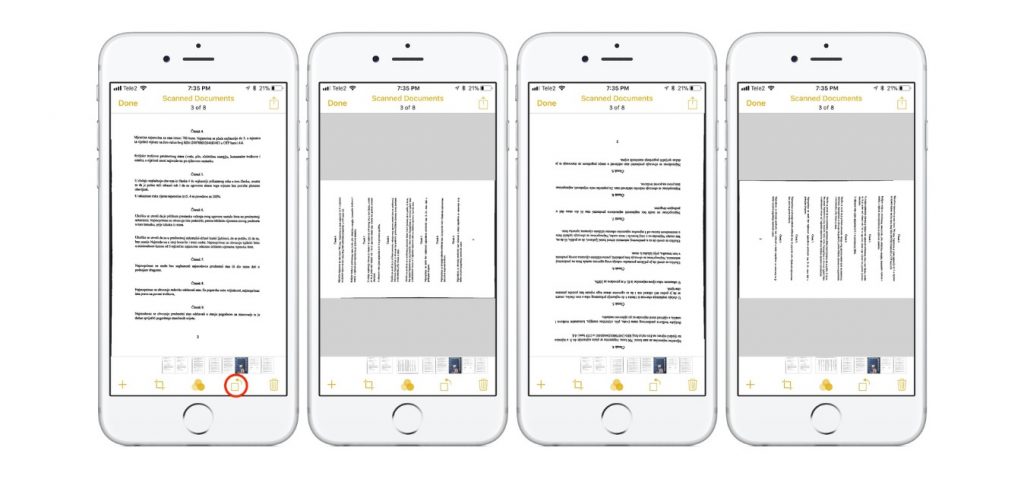
1- Open the iPhone Notes app, tap the paper-and-pen icon, place it at the bottom right corner, and create a new note.
2- Now tap on the camera and select scan documents.
3- Place a document under the lens of your iPhone. The system will automatically take the scan when an orange highlighted box appears.
Note: if it doesn’t scan, press the shutter or volume down buttons to capture the image.
4- Should the size not meet your expectations, you have the option to click and drag each corner of the scanning box for better alignment with the document. It is important, however, to ensure that you avoid dragging the box into the background.
Note:If you’re scanning multiple pages, continue to scan them one by one; the system will automatically create the compiled file.
5- Press save when you finish scanning.. The button automatically keeps the count of how many pages you’ve scanned.
Note: that all the scanned pages will be piled up in a new note in the note app. You can easily add other text or images to that note.
How to Mark up a scanned document on an iPhone:
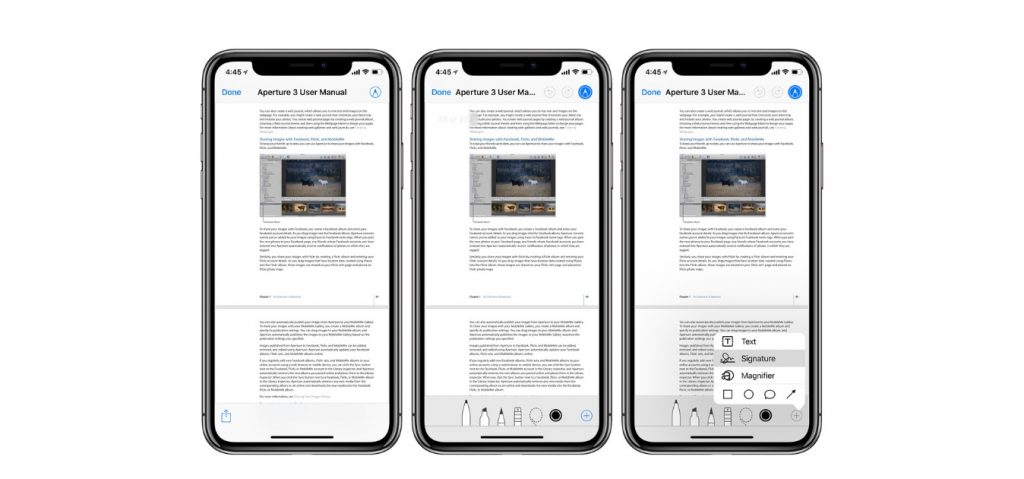
Markup tools in the note app help you highlight, handwrite, move the sections, add text, shape the box, etc. The notes app allows you to mark up scanned documents easily. It also allows you to add your signatures within the notes app. If you have learned how to scan documents with an iPhone, here’s how you can mark up the scanned document.
1- Open the scanned document app under the notes.
2- Tap on the share button in the upper-right corner.
3- Markup and explore the tools you want to add.
4- Tap on the tool you want to use in the scanned document.
5- If you want to add a text box, signature, magnifier, or shape to your document, press +.
6- Mark up your document.
7- Tap done if you are done with markup. All markups will be saved.
How to save a scanned document as a PDF
iOS 17 notes app automatically changes the scanned document into PDFs. But if you’re using the old version, here is how to do it.
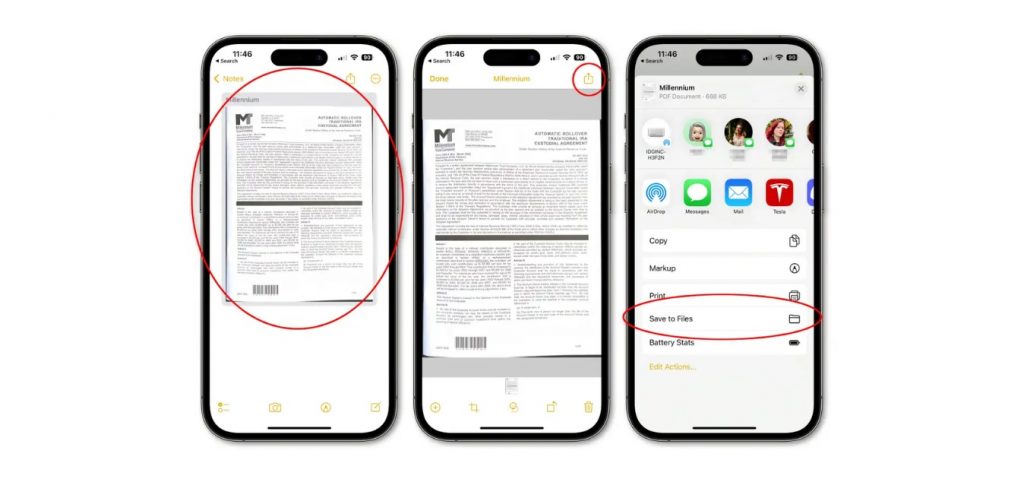
1- Open the Scanned document
2- Now tap the share button in the upper right corner.
3- choose the app to which you can save your PDF.
The scanned document is saved into PDF.
To share the scanned document? You can easily do it within the notes app.
1- Tap on the scanned document under the notes app.
2- Tap on the share button in the upper right corner.
3- Tap on the app where you want to share a note.
4- Share your PDF.
Optimize iPhone setting for document scanning:
You must adjust the camera setting if you cannot see the scan document option. Go into the camera settings and ensure the scan document option is enabled. You can also customize the notes app setting to streamline the scanning process.
If you encounter challenges while scanning, try to close the app and start the process again. To improve the other challenges like improper or blurred scans, try to scan documents under adequate lightning and steady your hand while capturing. Make sure your camera lens is clean for optimal results.
Have you learned how to scan documents with an iPhone? Undoubtedly, the iPhone’s built-in scanning feature offers unparalleled convenience and efficiency for users. By simply following the step-by-step process of scanning documents with an iPhone, you can easily scan documents directly through your device without relying on third-party apps.